Schoology Resources
The Schoology Resource Center is one of the most important features for curriculum management and teaching techniques, such as differentiated instruction.
It is your personal filing cabinet inside of Schoology. You are also able to connect to external storage drives, such as, Google Drive or One Drive, to access everything you need during the year right within Schoology.
What are the advantages of using the Resource Center?
You can organize all your curriculum materials, including Schoology items, such as, assignments, assessments, discussions, etc. within Schoology.
You can create different "collections" (banker boxes) to keep your materials organized and easy to find.
Find any material faster by using the Search tool.
It makes it easier to copy any content to your existing courses, without having to dig through your archived courses looking for stuff from previous school years.
You can plan and prepare not only Schoology assignments, assessments, discussions, etc., but also rubrics and question banks!
You are able to share with any teacher the content you have in your Personal Resource area.
You can collaborate with your peers in creating resources in a Group and allowing group members to add materials. (Go to Groups to learn more)
You can find hundreds of resources in the Public Resource area that you can use in your own Schoology courses! You can filter by subject area, resource type, grade level, file format or rating!
You can connect to your Google Drive or OneDrive to bring content into Schoology.
How can I organize and share my Resources?
Personal Resources
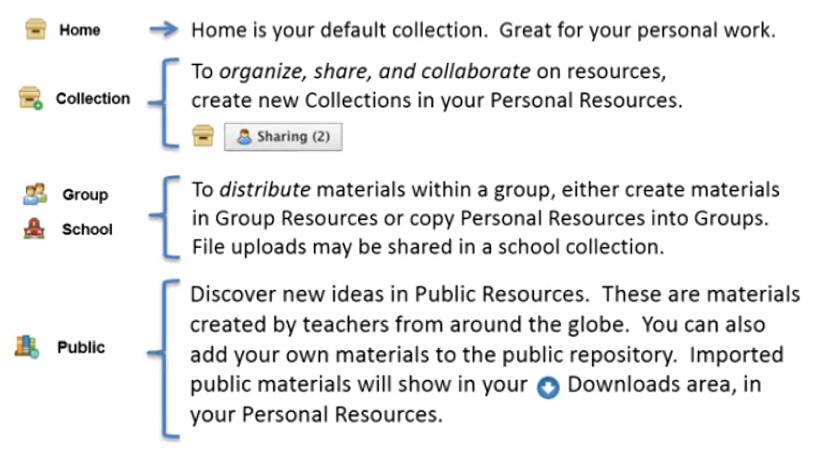
My Resources, your personal library, is a cloud-based storage space where you can save all your courses and materials. You can use this area to create resources, as well. Anything saved in My Resources can be copied and transferred into any or all of your courses. Once copied into a course, the material can be modified to fit specific classroom needs without altering the original copy.
Collections
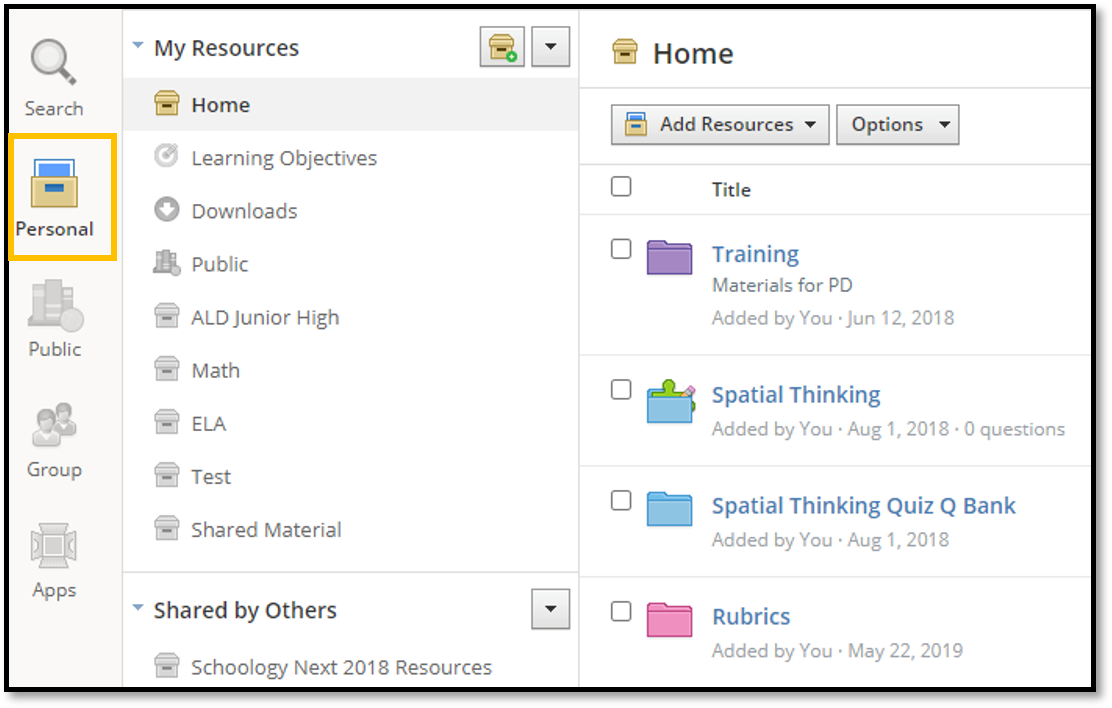
A collection is like a container that stores courses, folders, files, and resources you may want to use in your account. You can think of a collection as a master folder that helps organize all of your work. For example, you can create a collection for each year, for each grading period, or for each course.
The Home collection is a personal collection of resources created and saved to your Resource Center. This collection exists by default, and it’s only available to you. To share collections of resources with other faculty and connected users, you can create additional collections.
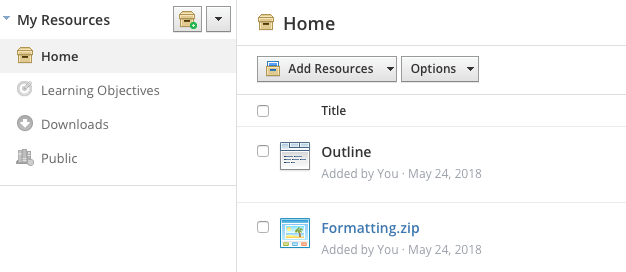
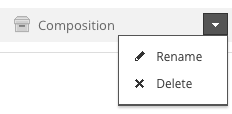
How to add or delete a collection
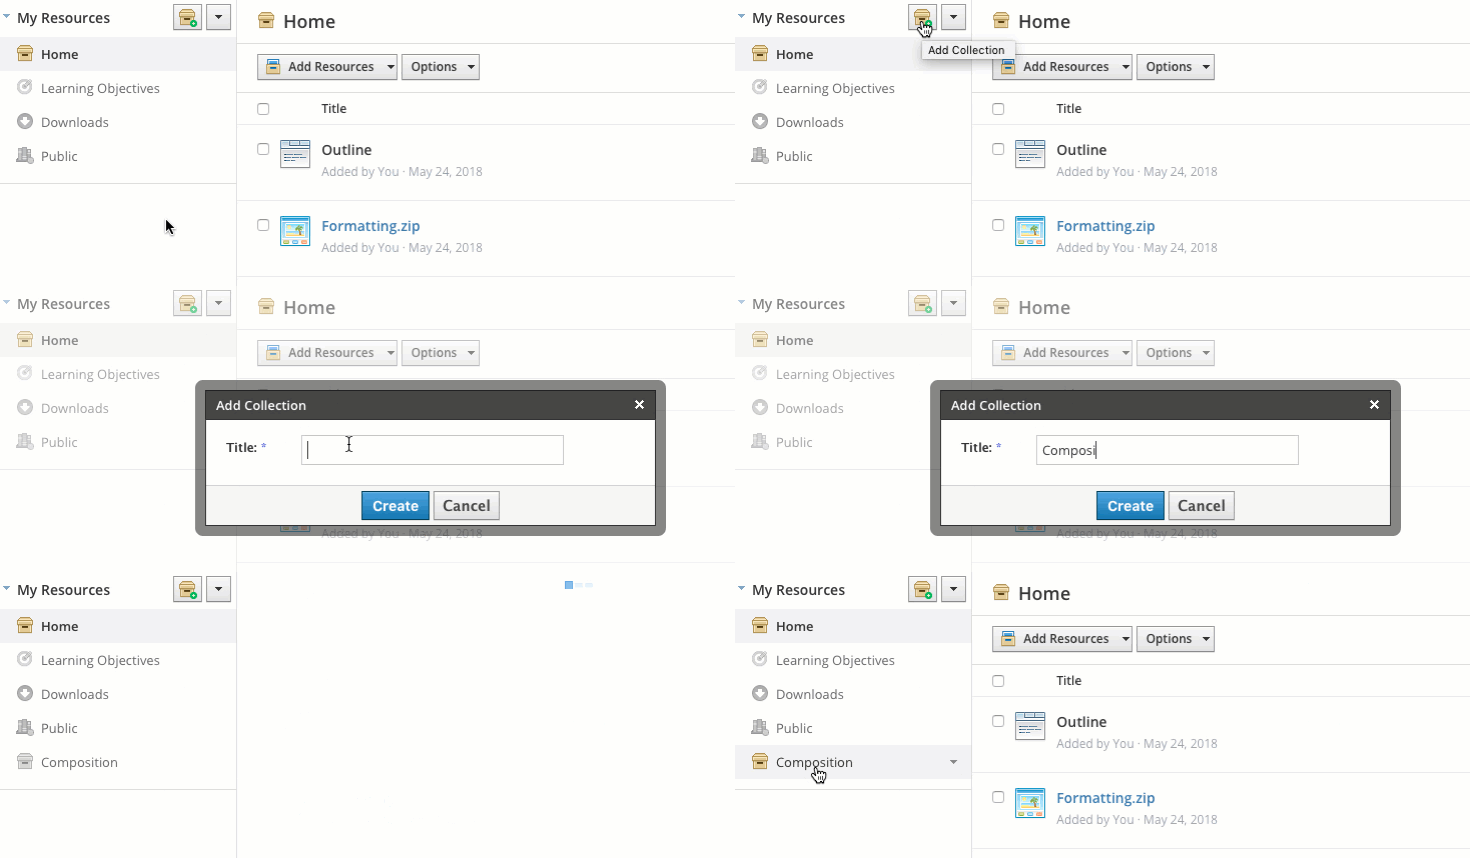
How to create and save items in Resources
Create a Resource
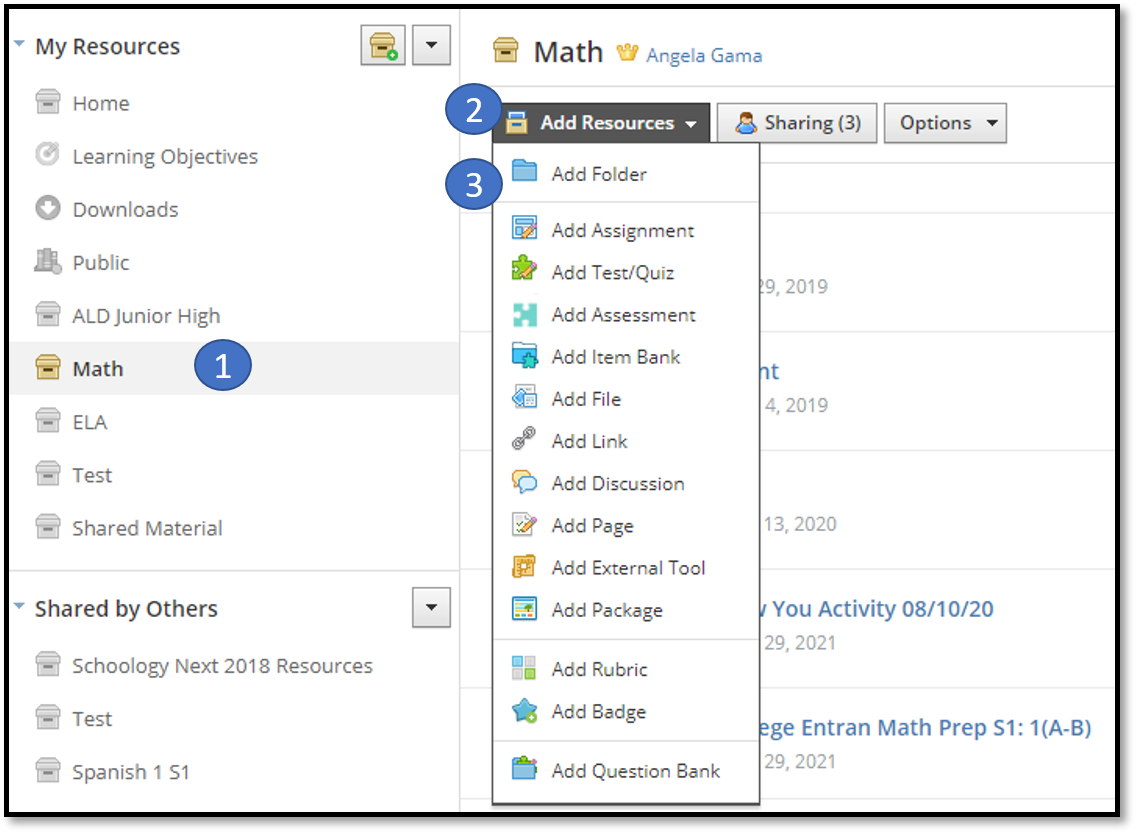
To create a resource from a collection, follow these steps:
Click on the collection where you'd like to create your resource
Click Add Resources
Select the item that you'd like to create/add.
Complete any details for the item. Please note that you will not be able to add certain fields, such as, due date, category, grading period. You will be able to customize these details when you copy the item into a course.
Click Save/Submit.
Copy a Course to your Resources
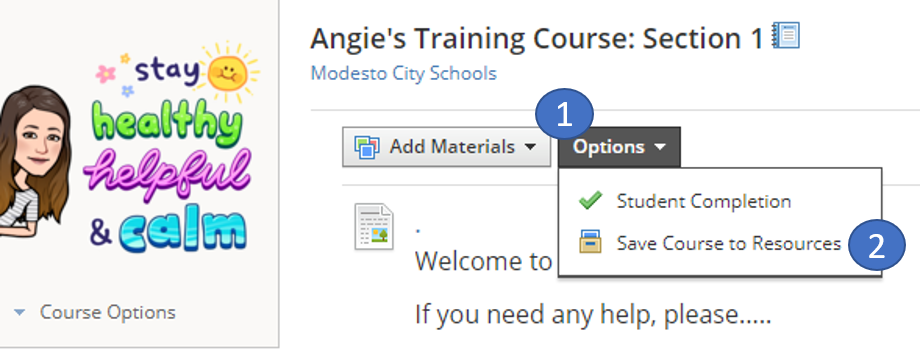
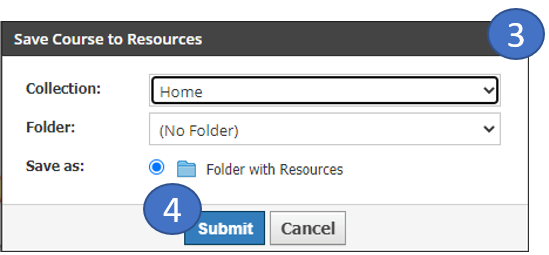
PuNote: Depending on the size of your course, it's how long it will take for it to show up in your Resources area.
Copy Individual Items to your Resources
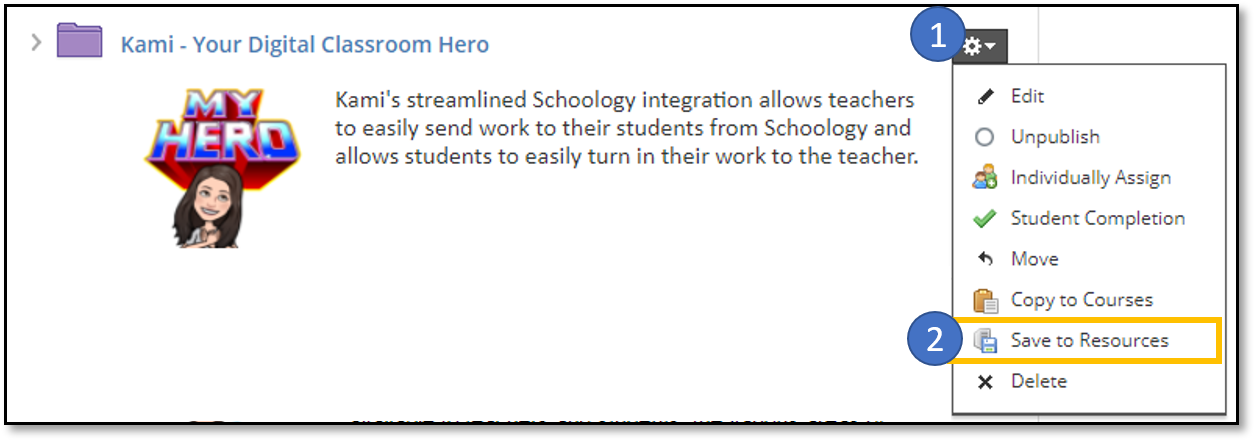
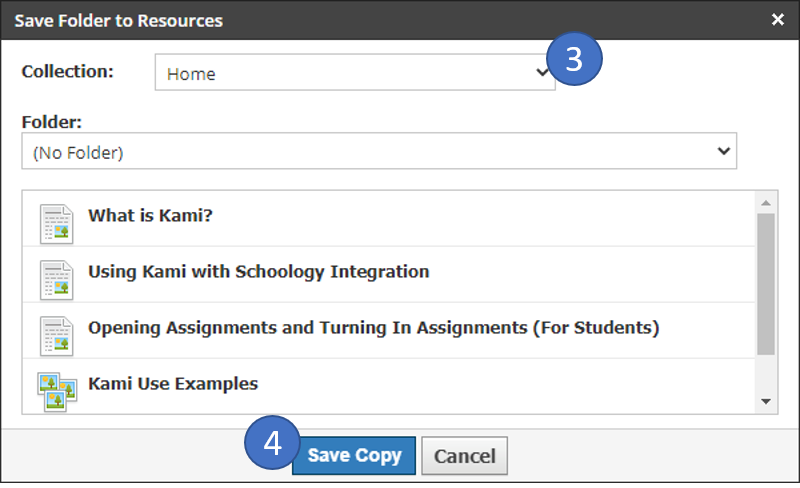
You can copy any item in your course to your Resources by accessing the gear icon menu and selecting Save to Resources.
How to Share a Personal Collection
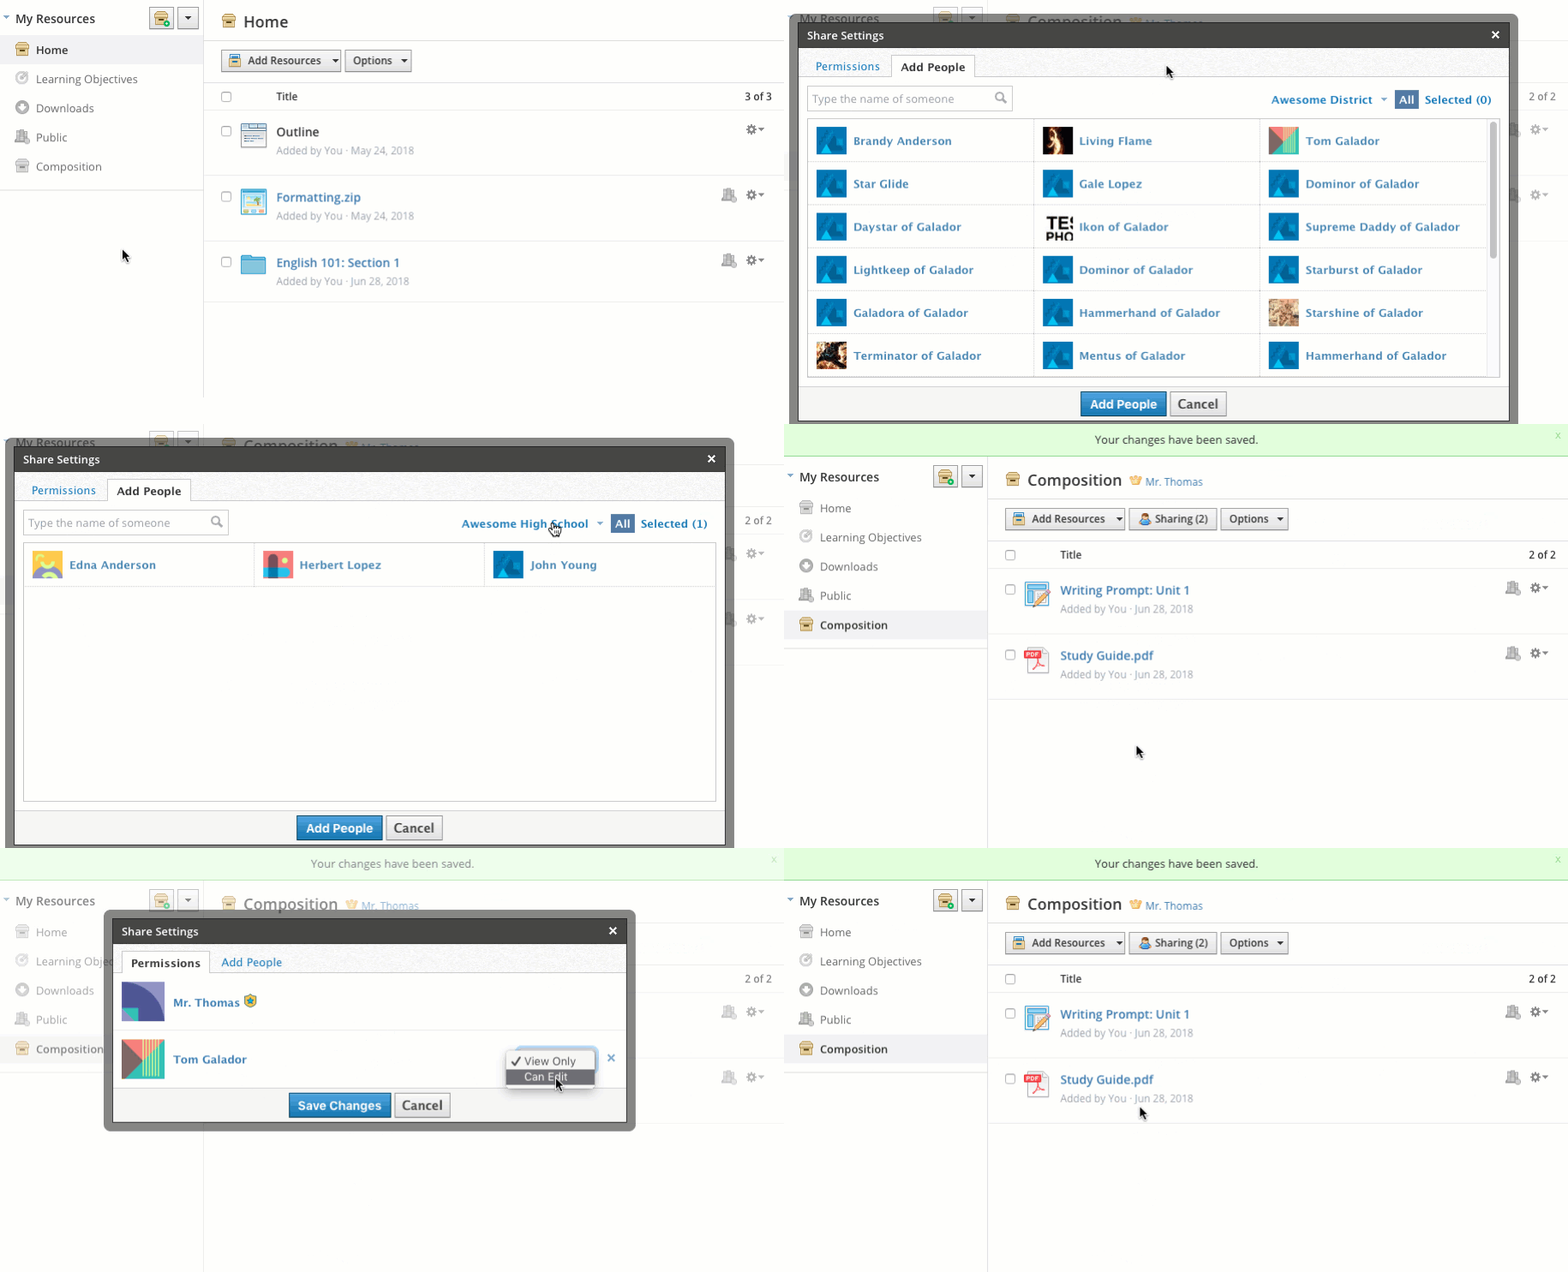
You may choose to share your collection (excluding Home) with other educators or connected users by clicking Share.
To share a collection, follow these steps:
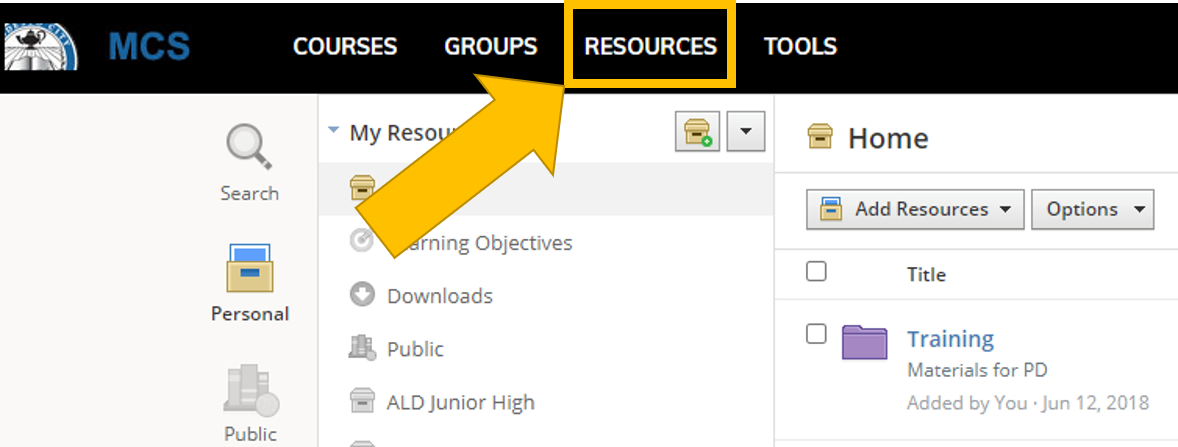
Click Resources.
Click a collection you’d like to share. (You cannot share resources within the Home collection.)
Click Share.
Select all users you’d like to share with and click Add People. You may need to select a different building in order to locate other users.)
Remove people if desired using the X to the right.
Click Save Changes to complete.
Downloads

This area of your personal resources contains a list of resources you’ve downloaded from Public Resources.
From the gear to the right of a downloaded resource, you can perform the following actions:
Add to course: If the resource-type is one that can be imported to a course, this option enables you to add the item to any course you administer.
Copy to: This option enables you to create a copy of the resource into another collection.
Move to: This option enables you to move the resource into another collection.
Delete: This option enables you to delete the resource.
Public Resources
Public Resources enables educators from all over the globe to share various types of resources for free. As an educator, you can access Public Resources from the header in Schoology, or from within My Resources.
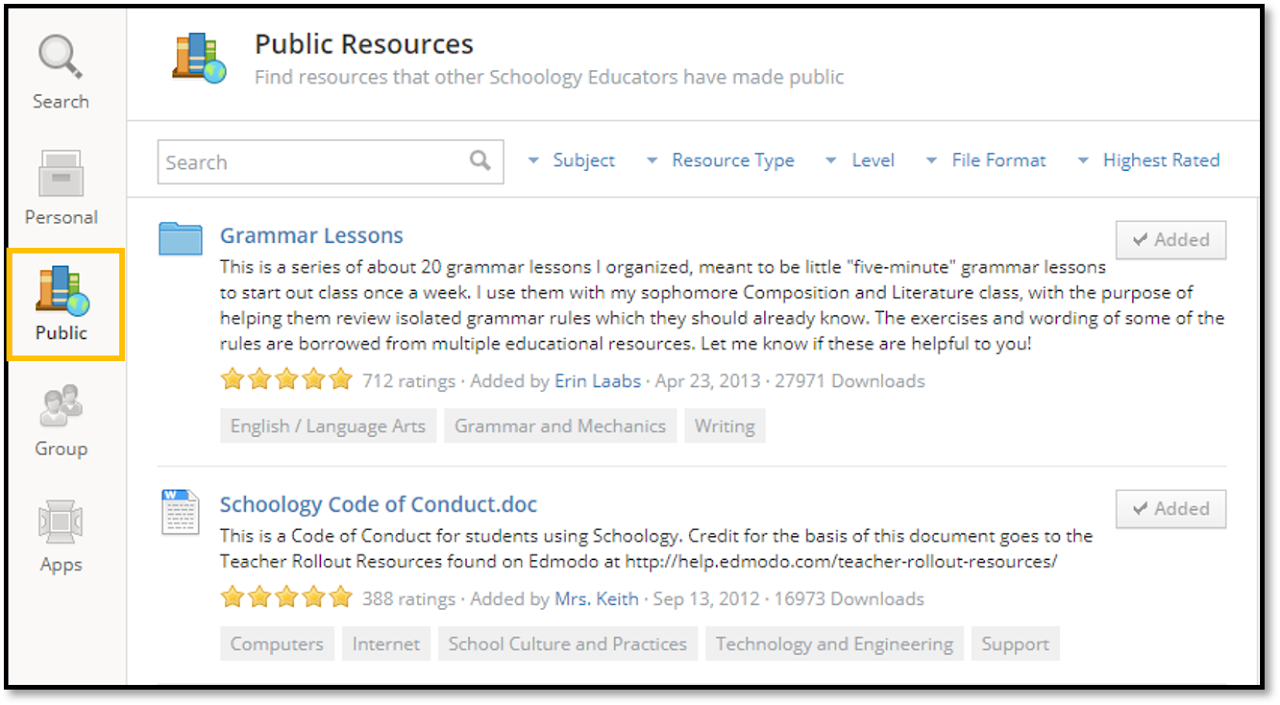
Public Resources are files, links, course materials, or folders of content shared by other members of the Schoology community. Search through our growing database for instructional resources. You can read comments and see ratings for each resource. Download the resource into your personal resources, and add them to your courses. You can also share any of your personal resources with users around the world.
Browse and Download Public Resources
To view resources shared by the Schoology global community, navigate to the Public area of your Resource Center. Educators can enrich their courses by browsing through and downloading diverse content.
To filter your search, use the following areas to find more specific content:
Subject
Resource Type
Level
File Format
Rating
When you download a resource from Public Resources to your Personal Resources, you can add the resource to courses and groups you administer or copy the resource to other resource collections.
To download public resources, follow these steps:
Click the Download icon to the right of each resource.
This saves a copy of the item to the Downloads collection in Personal Resources. To organize, copy, or move the item to a group or course you administer, navigate to the Downloads collection.
Group Resources
Group Resources holds shared resources from all groups to which you belong, as well as your School Resources. If you’re not yet a member of any groups, or if you haven’t yet selected your school, the list of resources will appear empty.
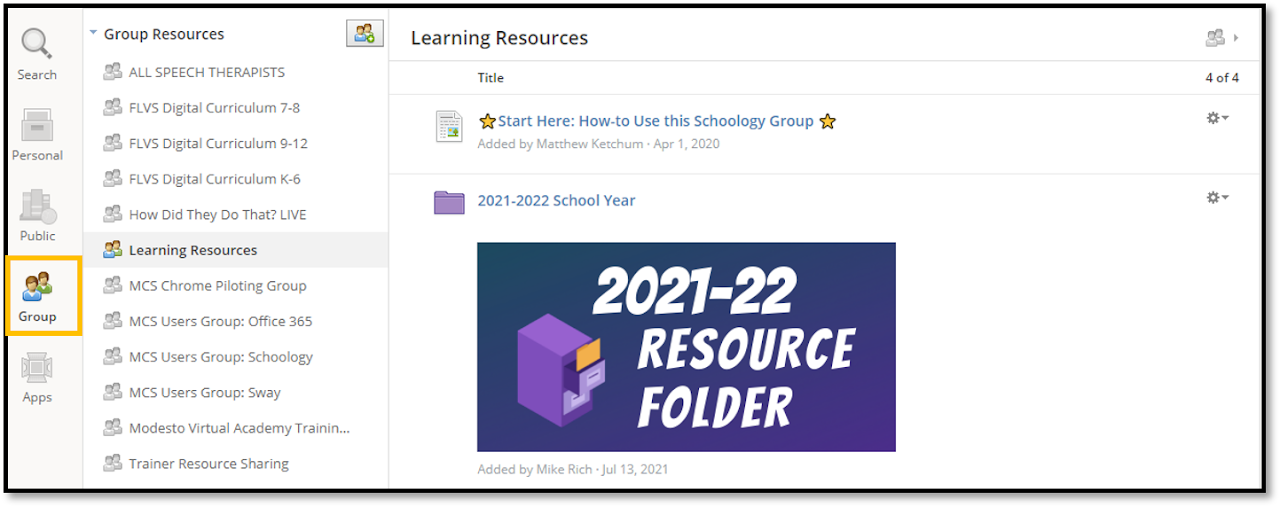
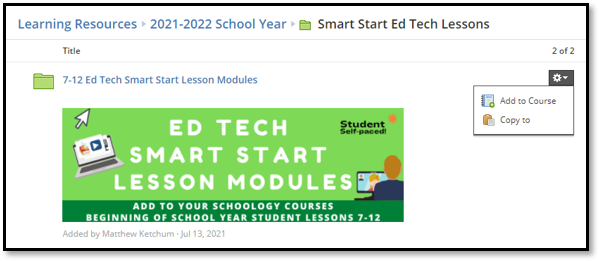
Depending on the privacy settings within the group, you may have some or all of the options available for managing Group Resources. From the gear to the right of a resource, you can perform the following actions:
Edit: Edit the name, folder color, and description of the item.
Add to course: If the resource-type is one that can be imported to a course, this option enables you to add the item to any course you administer.
Copy to: This option enables you to create a copy of the resource into another collection within resources.
Move to: This option allows you to organize the item within the folders of the current collection.
Delete: Delete the collection.
Resource Apps
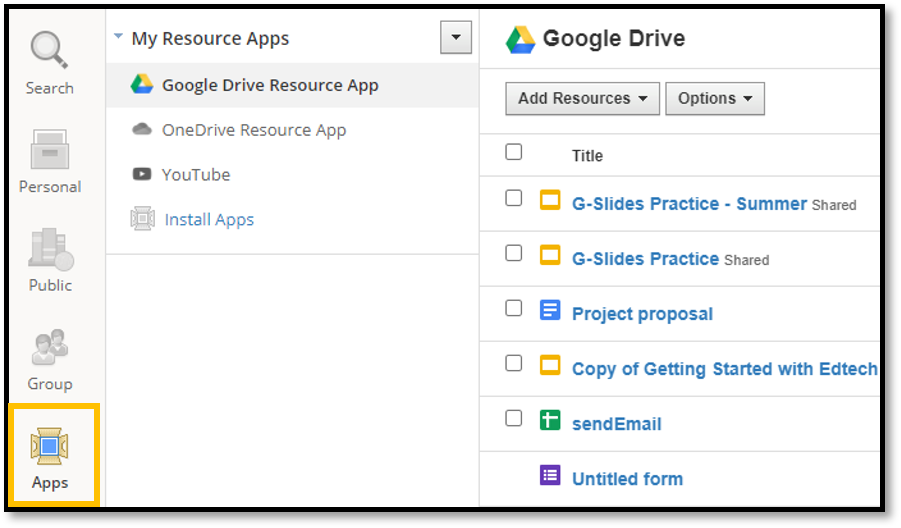
Resource Apps integrate third-party content, such as OneDrive or Google Drive, directly into the Resource Center. This means that all of your personal, shared, public and external instructional resources are consolidated in one place.
If you're accessing the My Resource Apps area for the first time, you may see a button to Install Apps.
Select the Resource of your choice.
Click Install to complete.
Technology Support Hotline for Teachers and Staff: (209) 574-8600 and Service Center Locations
